Instructions for setting up a proxy server on iPhone & iPad
29.05.2025
A proxy server is a versatile tool that acts as an intermediary between your device and the internet, offering users a wide range of benefits.
First and foremost — anonymity.
A proxy hides your real IP address, significantly enhancing both security and privacy. This is particularly important in marketing, where companies conduct research without revealing their identity.
Second — performance boost.
Proxies can cache data, which speeds up the loading of previously visited pages. This is especially useful in analytics, where every second matters.
In the field of management, proxies help control and monitor internet traffic within a company.
This ensures a secure connection for all employees and allows administrators to restrict access to non-work-related websites.
In analytics, proxies are used to collect data from various web resources efficiently and seamlessly.
This is critical for research companies that require a constant stream of information.
Belurk offers reliable proxy solutions.
The service provides high-speed, stable connections and a wide selection of IP addresses — perfect for users looking for a convenient and secure way to interact with the internet.
Proxy Setup Instructions for iPhone & iPad
Step 1: Open Settings
Launch the Settings app on your iPhone or iPad.
Step 2: Go to the Wi-Fi Section
Find and tap Wi-Fi. You’ll see a list of available networks.
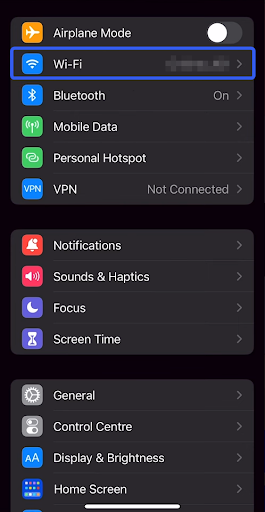
Step 3: Locate Your Network
Next to the Wi-Fi network you're connected to, tap the information icon (i) to open its settings.
Step 4: Configure the Proxy
Scroll down to the Configure Proxy section and tap it.

Step 5: Choose a Configuration Method
Select Manual. This option allows you to enter specific proxy settings.
Step 6: Enter Proxy Details
In the Server field, enter the IP address provided by your proxy service. In the Port field, type the appropriate port number.
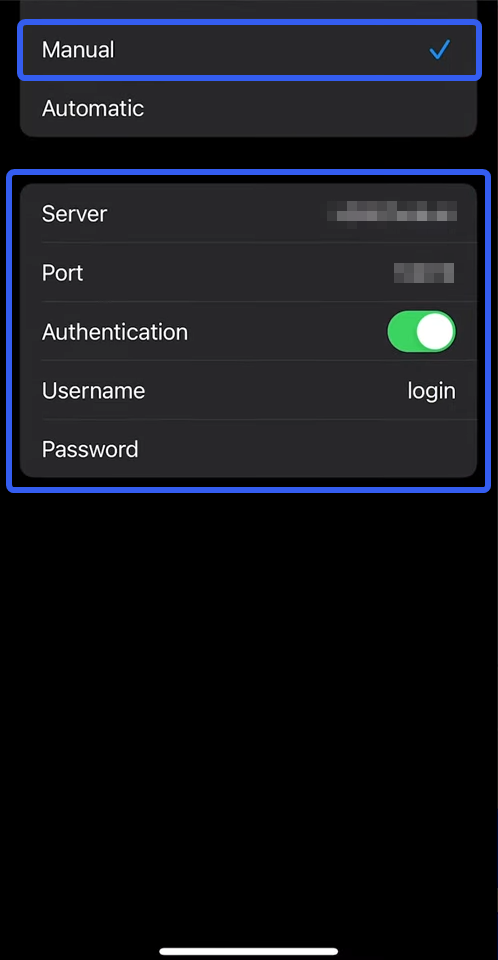
Step 7: Authentication
Be sure to enable Authentication. Here, enter your proxy login and password. You can find these details in your personal account on the proxy provider’s website. Choose your active service, and the login credentials will be displayed at the top.
Step 8: Save Your Settings
Once all fields are filled out, simply save the changes. You’re now connected to a secure proxy-enabled internet connection.
How to Disable a Proxy on iPhone
If you want to disable the proxy:
- Open the settings for your Wi-Fi network,
- Return to the Configure Proxy section,
- Set the toggle to Off.
This action will automatically deactivate the proxy server.
Frequently Asked Questions
How do I enable a proxy over a mobile network (LTE/5G)?
iOS devices do not have a built-in option to use proxies with mobile data. Proxy servers can only be used when connected to a Wi-Fi network.
How do I set up a proxy with login and password authentication?
When you connect to Wi-Fi and enter the proxy’s IP and port, your browser will prompt you to enter your username and password. This allows you to authenticate and use the proxy server.
How do I set up a proxy in Safari?
Safari uses the system-wide proxy settings. So, just follow the Wi-Fi proxy configuration instructions above. If you need to use a proxy for specific websites only, consider using third-party services or browsers that support individual proxy settings.
Try belurk proxy right now
Buy proxies at competitive prices
Buy a proxy